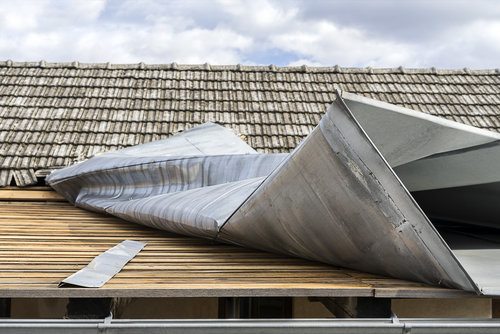
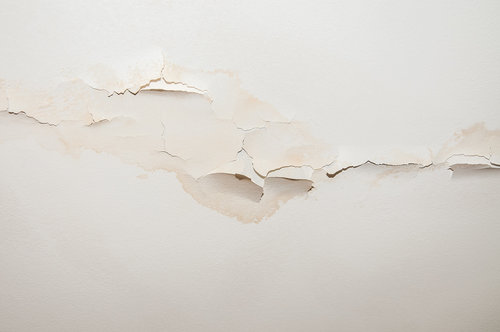
Home Articles

5 Important Steps to Take if You Have a Storm-Damaged Roof

Adam Graham

Published on February 23, 2023

Share

5 Important Steps to Take if You Have a Storm-Damaged Roof

If your roof has been damaged by a storm, make sure you follow these 5 steps.

To provide you with the most accurate and up-to-date information, we consult a number of sources when producing each article, including licensed contractors and industry experts.

Read about our editorial process here. Want to use our cost data? Click here.

Many homeowners across the U.S. are used to dealing with the after-effects of when a storm hits. Nobody knows exactly how much destruction heavy wind and rain will cause but hope that it’s minimal. Unfortunately, that is not always the case. And one part of the home that can be damaged greatly is the roof. 

Having a clear idea of what you need to do if you have a storm-damaged roof is essential. Repairing your roof can be costly, averaging roughly between $400 and $2,000, and therefore should not be left to get worse. If issues worsen it could eventually result in needing a roof replacement for which costs rise considerably. The average cost to replace a roof is between $9,500 and $20,000. So once a storm has cleared, make sure you act quickly and appropriately. To do so, take a look at these 5 important steps to take if you have a storm-damaged roof, starting with assessing the damage. 

1. Take a visual assessment of the storm-damaged roof

The first step should be to assess the extent of the damage. By taking an initial look, you can determine how extensive or minor the damage is. Major damage is easier to spot, of course. But just because you can’t clearly see a problem doesn’t mean it isn’t there. Start by taking a walk around your home. From there you can see if any parts of the roof are missing, such as shingles or tiles. You may also spot fallen materials from the roof on the ground. Then go up to the attic and check to see if there are any obvious signs of damage, such as leaks or holes. Don’t forget to check windows, gutters, and vents, which could also point to there being roof damage. 

While you can’t be completely sure of all of the issues, it’s good to have a general idea of how much work is going to be needed. Take photos and notes of any damage you find for insurance purposes. 

2. Take steps to ensure safety  

As soon as it is safe to go outside after a storm has hit and you have checked your roof for any major or minor damage, you should take the necessary measures to ensure everyone’s safety. Roof damage can result in other unforeseen issues. For example, if you find tiles on the ground around the home, there could be more that have come loose meaning a danger of more falling. Seal off areas where tiles are falling so as to avoid injury to anyone entering or leaving the home. If there is a leak, make sure you place a bucket under it to avoid a slip hazard or from damaging any other area of the home. 

In the event of a major hurricane or tornado, your roof may be the victim of some serious structural damage. If this is the case, it is wise to make sure you vacate your home for a period of time until it is safe to return. 

3. Contact your insurance provider and have your roof assessed 

At this stage, it is necessary to get in touch with your insurance provider. Not everyone’s experience will be the same, as it all depends on your insurance warranty and the company’s policy. In general, homeowner’s insurance will cover roof damage caused by storms, including wind and hail damage, and subsequently fallen trees. 

Your insurance company will send out an adjuster to assess the damage. An adjuster is the person who decides if you have a claim. It is possible, however, that your insurance company tells you to contact a local roof inspector to assess the damage first. Be sure to check whether the cost of a roof inspector is covered in your policy. 

Hire a local roof inspector

4. Begin the insurance claim process

If you find that the damage is large enough and the cost will amount to more than your insurance deductible then the next step is to file a claim. Be sure to ask all the relevant questions to know exactly what is included in your warranty; the cost of materials, labor, and damage from natural disasters or bad weather. Understanding the specifics of your warranty will ensure no nasty shocks of costs that you were not expecting later down the road. Once you have everything clear, you can move on to getting the repairs or replacement carried out. 

5. Hire a roofing contractor to repair or replace your roof

It is time to get in touch with a roofing contractor to deal with your insurance claim or simply make the necessary repairs. If you are claiming insurance, it is worth asking the roofing contractor if they have experience dealing with such situations. This can make the process a lot smoother for all involved. Be sure not to contract anyone until you have your claim approved. 

Another tip is to check that the roofing contractor you hire is local. It is not uncommon for companies from elsewhere to take advantage when a major storm hits an area. While they might get the job done, they might not be up to scratch on the vital local codes.

Once you’re happy you have found an experienced, licensed, and insured contractor, the repairs or replacement can begin. 

Hire a local roofing contractor 

Author: Adam Graham is an industry analyst at Fixr.com. He analyzes and writes about the real estate and home construction industries, covering a range of associated topics. He has been featured in publications such as Better Homes and Gardens and The Boston Globe, and written for various outlets including the National Association of Realtors, and Insurance News Net Magazine.