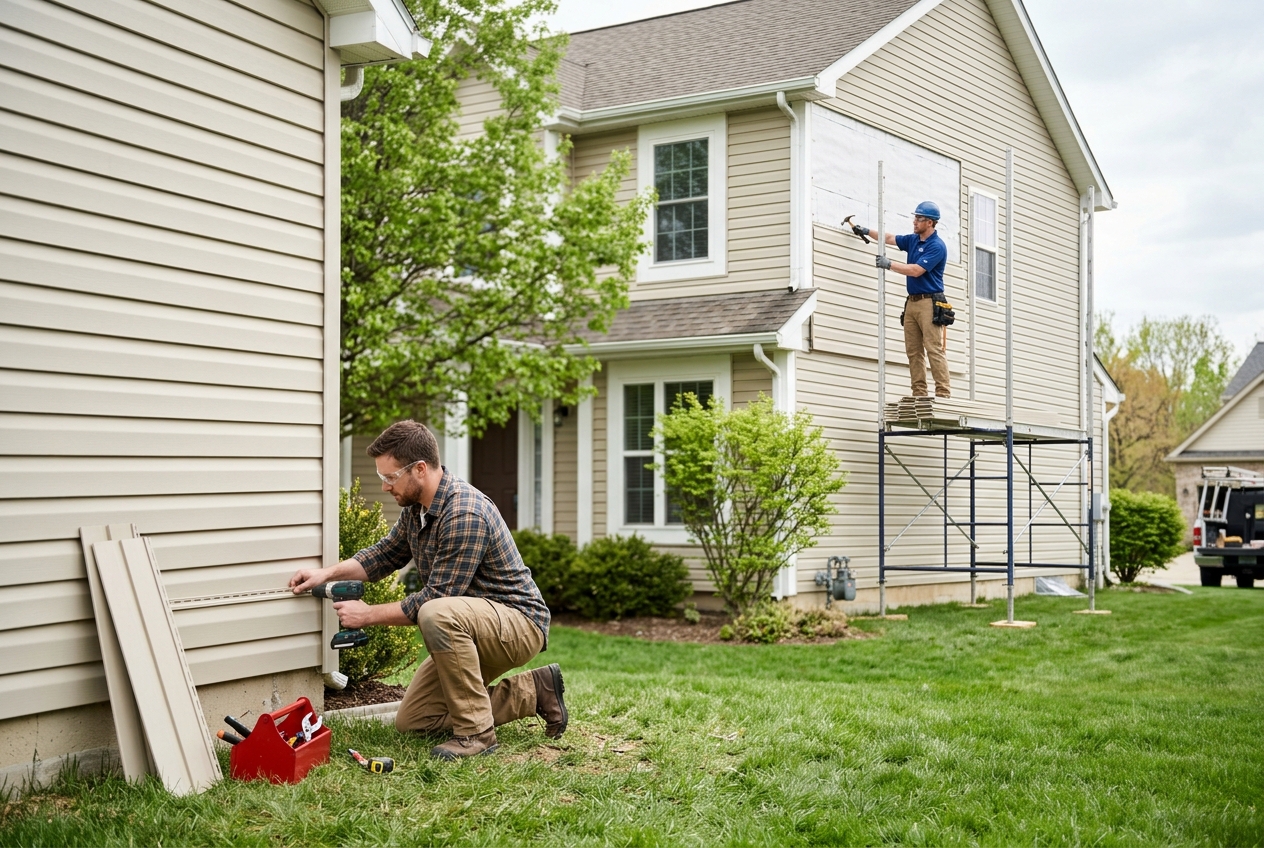
DIY Repair: Replacing a few damaged vinyl siding panels is a manageable task for experienced homeowners using specific tools.
Process Overview: The DIY repair involves detaching the panel above, removing nails, installing the new panel, and reattaching the upper siding.
Professional Scope: Full home siding replacement is a complex project that generally requires professional expertise.
Cost Expectation: A complete siding replacement for a home typically ranges between $8,000 and $30,000.
Replacing a few damaged vinyl panels is a manageable DIY project for experienced homeowners¹. However, a complete siding replacement for an entire home is a complex undertaking that typically requires professional help². Understanding the differences between these two scenarios can help you decide when to tackle a repair yourself and when to hire a contractor.
When to DIY Individual Vinyl Siding Panel Replacement
Individual vinyl siding panels can sustain damage from various sources, such as impacts, extreme weather, or age. If only a few panels are affected, a homeowner with some experience can often handle the replacement. This approach saves on labor costs and allows for a quicker fix.
Tools and Materials for DIY Panel Repair
Before starting a vinyl siding panel replacement, gather the necessary tools. Having the right equipment ensures a smoother, more efficient repair.
You will also need a replacement vinyl panel that matches your existing siding in color and style. It is often helpful to keep a few spare panels on hand for such repairs.
Step-by-Step Guide to Replacing a Damaged Vinyl Panel
The process for replacing a single vinyl siding panel involves several distinct steps.¹ Following these carefully helps ensure a secure and watertight repair.
First, detach the panel directly above the damaged one. Use a vinyl siding removal tool, also known as a zip tool, to carefully unhook the bottom lip of this upper panel. This provides access to the fasteners of the damaged panel.¹
Next, lift the loosened siding to reach the nails holding the damaged panel in place. Use a pry bar to gently remove these nails. Once the nails are out, slide the damaged panel down and disconnect it from the piece below it. Take this opportunity to inspect the house wrap underneath. If it is torn or damaged, patch it before installing the new siding.¹
Measure and cut the new vinyl panel to the correct length. Remember to leave a 1/4 inch gap at each end for expansion and contraction due to temperature changes¹. This gap prevents buckling.
Install the new panel by snapping its bottom edge into the lock of the lower panel. Then, nail the panel every 12 to 16 inches, centering the nails within the nailing slots. Leave a small gap under the nail heads; this allows the panel to move freely with temperature shifts, preventing warping¹.
Finally, reattach the upper siding. Use the zip tool to pull down its bottom lip and snap it over the top edge of the newly installed panel¹. Ensure all locks are properly engaged for a secure finish.
Always leave a 1/4 inch gap at the ends of vinyl siding panels and slightly loose nails. This crucial step prevents buckling and warping as the material expands and contracts with temperature changes.
When Professional Siding Replacement is Necessary
While individual panel repairs are feasible for DIYers, a full siding replacement project is much more involved. This type of work goes beyond simply swapping out a few pieces.
Complexity of Full Siding Replacement
A complete siding replacement encompasses many elements that require specialized knowledge and tools. This includes preparing the wall, which involves installing new house wrap and flashing around openings. It also means correctly installing starter strips, corner posts, and J-channels around windows and doors². Each of these components must be precisely measured and fastened to ensure a watertight and durable exterior.
Improper installation during a full siding replacement can lead to several problems. These issues include buckling, warping, cracking, and moisture intrusion, which can damage the underlying structure of the home². Professionals have the experience to avoid these common pitfalls.
Cost of Professional Siding Replacement
For homeowners in the US, a full siding replacement typically ranges between $8,000 and $30,000³. This cost varies significantly based on factors such as the size of the home, the type of siding material chosen, regional labor rates, and the complexity of the architectural design. For a detailed breakdown of costs by material, home size, and labor, refer to our guide on Siding Replacement costs.
Pros
- + Ensures correct installation, preventing future issues like buckling or moisture damage.
- + Professionals handle complex tasks like wall preparation, house wrap, and flashing.
- + Saves homeowners significant time and effort.
Cons
- - Higher upfront cost compared to DIY individual panel repair.
- - Requires scheduling and coordination with contractors.
- - Homeowners have less direct control over the day-to-day work.
Choosing Between DIY and Professional Services
The decision to undertake a DIY repair or hire professionals largely depends on the scope of the damage and your comfort level with home improvement tasks. For isolated damage to a few vinyl panels, a DIY approach is often practical and cost-effective. However, if the damage is widespread, covers multiple sides of the house, or involves issues beyond superficial panel damage, professional intervention is usually the best course of action.
Professionals can assess structural integrity, handle unforeseen complications, and ensure compliance with local building codes. While DIY saves money on labor, the potential for errors in a full replacement project can lead to more expensive repairs down the line. Homeowners interested in exploring different siding materials beyond vinyl can review guides on Metal Siding Replacement or Wood Siding Replacement.
Most homeowners in the US can expect to pay between $8,000 and $30,000 for a full siding replacement, depending on factors like home size, material, and labor rates³.
Home insurance policies often cover siding replacement if the damage is caused by a sudden, accidental event like a storm or fire. However, wear and tear or damage from lack of maintenance are typically not covered. Review your specific policy for details.
To replace vinyl siding, you first detach the panel above the damaged one using a zip tool, then remove the nails holding the damaged panel with a pry bar. Install the new panel by snapping it into place, nailing it every 12 to 16 inches, and then reattach the upper siding.
For vinyl siding panel replacement, you will need a vinyl siding removal tool (zip tool), pry bar, tin snips or utility knife, hammer, roofing/siding nails, and a tape measure⁴.
Improper installation of vinyl siding can lead to issues such as buckling, warping, cracking, and moisture problems, potentially damaging the underlying structure of your home².
House wrap is a synthetic material installed over the exterior sheathing of a home before siding. It acts as a weather barrier, protecting against moisture intrusion while allowing water vapor to escape, preventing rot and mold.
Yes, many homeowners choose to mix and match different siding materials or styles to create visual interest or enhance architectural features. For example, you might use vinyl siding on most of the house and stone veneer accents.
It is advisable to inspect your home's siding annually, ideally in the spring, to check for any damage, loose panels, or signs of wear. Early detection of issues can prevent more extensive and costly repairs.
Deana is a Home Improvement Editor with a passion for helping homeowners navigate renovation, repair, and remodelling with confidence. Specializing in roofing, kitchen and bath remodelling, and outdoor living spaces, she combines industry knowledge with a genuine commitment to making complex home projects feel approachable for readers at every stage of their journey.
Her path into home improvement media began after several years working alongside licensed contractors in project coordination, where she gained firsthand exposure to the realities of home renovation - from permitting delays to material sourcing challenges. This hands-on experience gave her a practical, ground-level understanding of what homeowners actually need to know before hiring a contractor, choosing materials, or starting a project - insight that now shapes every piece of content she creates.
As an editor, Deana oversees content covering product reviews, cost guides, seasonal maintenance tips, and contractor vetting advice, working closely with writers and industry experts to ensure accuracy and relevance. She has a particular interest in emerging trends like smart home technology and energy-efficient upgrades, and enjoys translating technical information into clear, actionable guidance for homeowners.
Beyond editorial oversight, Deana stays closely connected to the pulse of the home improvement industry - tracking shifts in consumer preferences, pricing trends, and the challenges homeowners face when navigating renovation projects, from budgeting to finding trustworthy professionals.
When not editing, Deana enjoys visiting local open houses for design inspiration and tackling small DIY projects around her own home. Based in Adelaide, Australia, she believes a well-maintained, thoughtfully upgraded home is one of the most meaningful investments people can make in their day-to-day quality of life.
Sources:
Replacing Damaged Vinyl Siding A Step By Step Guide (marshalltown.com)
How To Replace Vinyl Siding (ussiding.net)
Siding Replacement Cost (thisoldhouse.com)
How to Replace a Piece of Vinyl Siding: DIY Guide, cosva, 2026 (hoosierwindows.com)